We found that the errors of many items in daily water quality inspection were mostly not caused by instruments, but were caused by improper use of analysts in the process of use and operation, or some details of operation steps were not paid attention to.
For the testing industry, any error in any operation link will have an impact on the final results. For example, the instrument was not zero calibrated during the testing process, the pollutants on the colorimetric bottle were not wiped clean, and the agents were not used correctly during the operation. These operational problems affect the results of water quality testing.
We will continue to tell you about the use of the water quality detector. Today, we will explain the correct use of the residual chlorine detector. Residual chlorine is a kind of chloride ion substance produced after disinfection of water body, which mostly occurs in drinking water. Therefore, residual chlorine detector is also one of the commonly used water quality measurement equipment.

Preparation before using the instrument
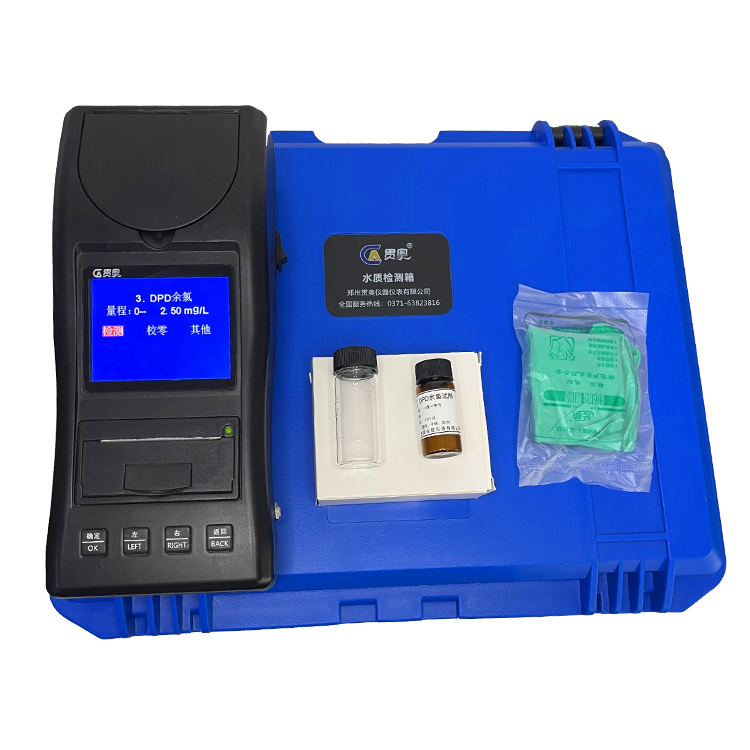
1. Prepare DPD residual chlorine reagent in quantitative bags or bottles.2. Grade I pure water in the laboratory.
3. Collect a good test water sample.
4. Colorimetric bottle
5. Residual chlorine detector
6. Other common laboratory equipment.
Operation of residual chlorine detector
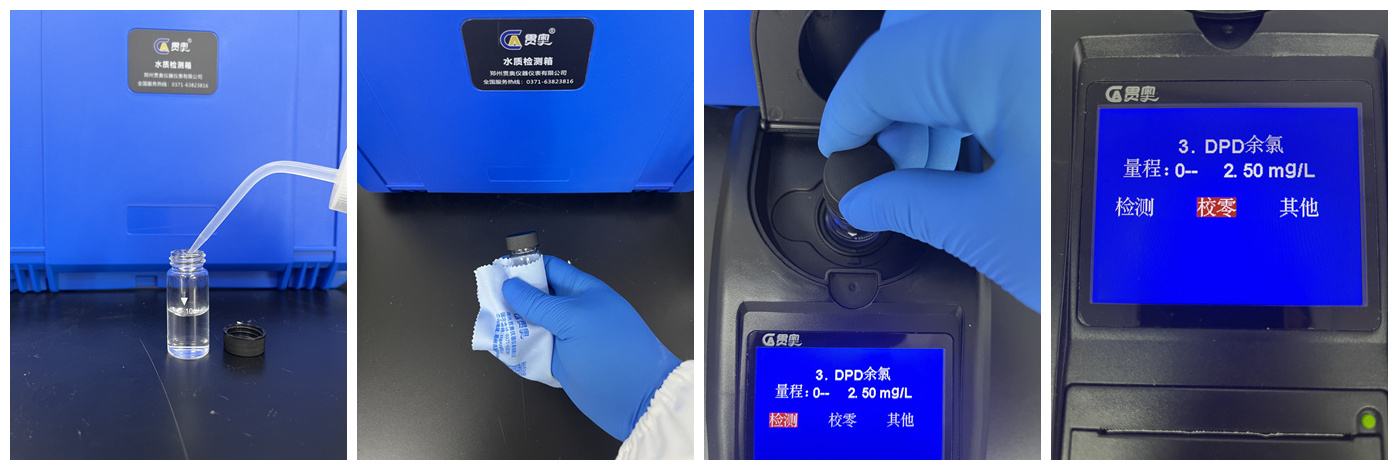
1. Slowly pour the prepared laboratory grade I pure water into the colorimetric bottle, and measure it at the 10mL scale line.2. Wipe the water stain, sweat, oil stain, dust and other pollutants on the external body of the colorimetric bottle with a soft cloth or a dustless soft paper to avoid the above substances interfering with the final detection result of residual chlorine.
3. Open the sunshade cover on the residual chlorine detector, align the white triangle symbol on the color comparison bottle with the triangle symbol on the color comparison pool, and then slowly put it in. Determine the position and put the sunshade cover on the back cover.
4. Operate the instrument button to move the cursor to the "zero calibration" position on the screen, press the "OK" button, and quietly wait for the completion of the zero calibration of the detector.
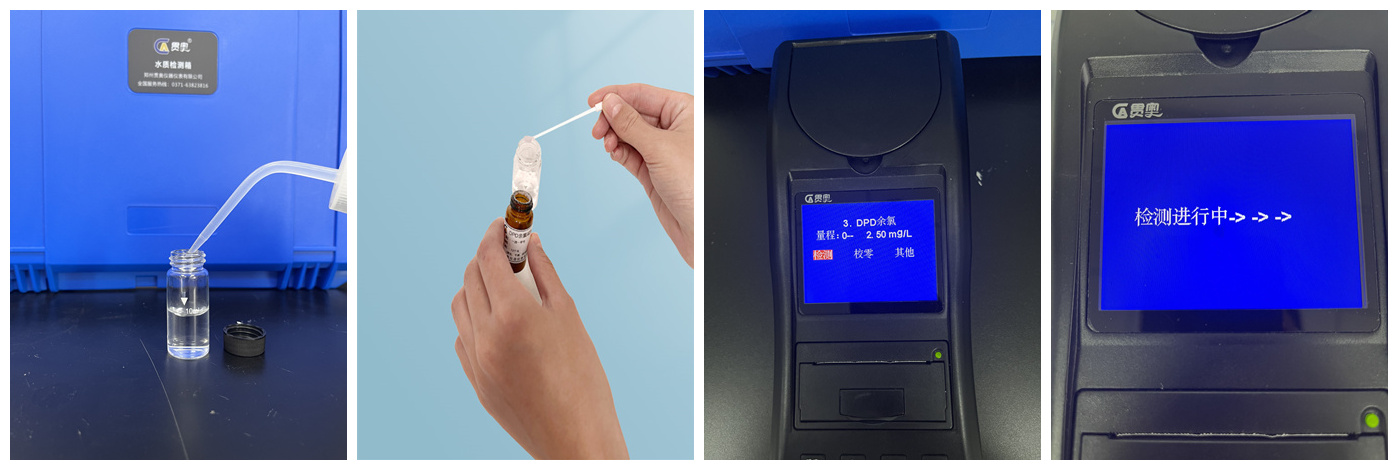
5. Slowly pour the treated water sample to be tested into the colorimetric solution, and measure it at the scale line of 10mL.
6. Add DPD residual chlorine reagent into the colorimetric bottle. If it is bottled reagent, take 1 tablespoon, then shake the colorimetric bottle to make the reagent dissolve evenly.
7. After the color comparison bottle stands for 30 seconds, wipe the bottle wall with the soft cloth or dust-free paper provided, align the triangle symbol on the bottle body with the triangle symbol on the color comparison pool, and then slowly put the color comparison bottle into the color comparison pool.
8. Move the cursor to the "Detection" position, press the "OK" button to wait for the final detection result. After the residual chlorine detection result comes out, you can select "Print" and press OK to print.


matters needing attention
1. The colorimetric bottle shall be moistened and washed before and after the detection or zero calibration to avoid the interference of residues on the inner wall of the bottle to the residual chlorine detection.2. When taking pure water for zero calibration or water sample for testing, the amount of water taken shall not be less than 10mL.
3. The residual chlorine agent shall be poured vertically onto the liquid level of the water sample in the bottle, and shall not be poured onto the inner wall to slide into the water sample.
The above is the correct use method and steps of residual chlorine detector.


